The Reports area allows you to generate and print reports and documents for your class including participant information and rosters, name tags, attendance reports and more.
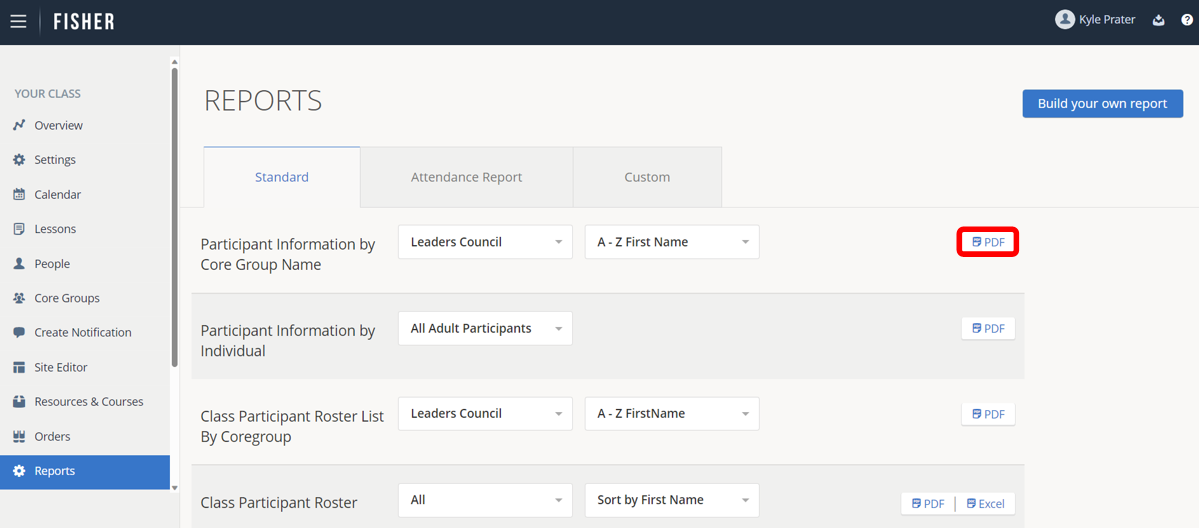
Standard Reports
The standard reports tab allows you to print standard reports for your class. This tab is where you will find the majority of reports that you will need for your class.
To generate and download a report:
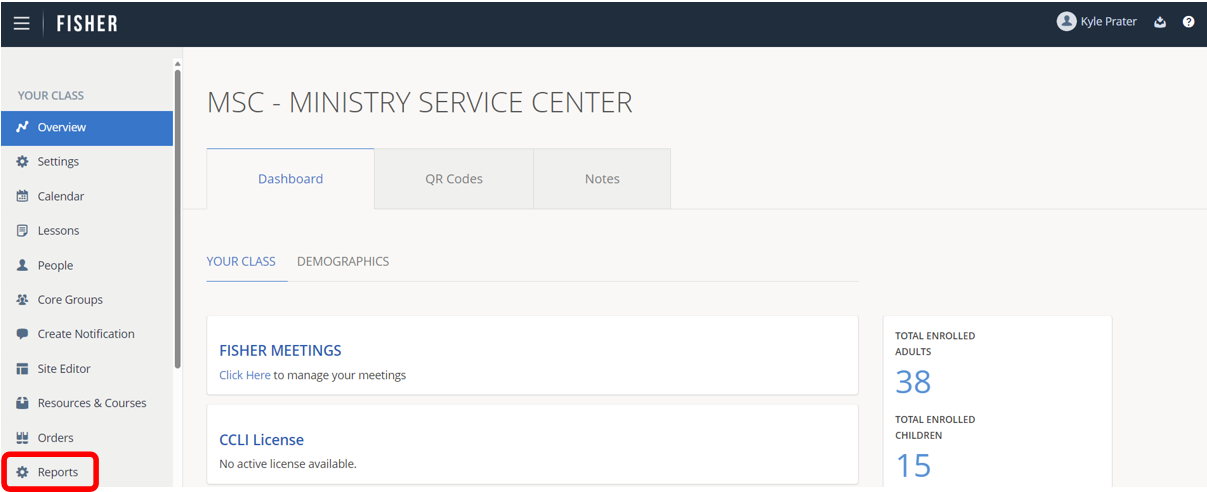
1.) Click Reports in the left-pane.
2.) Find the report you would like to generate. You may need to scroll down to find the report you need.
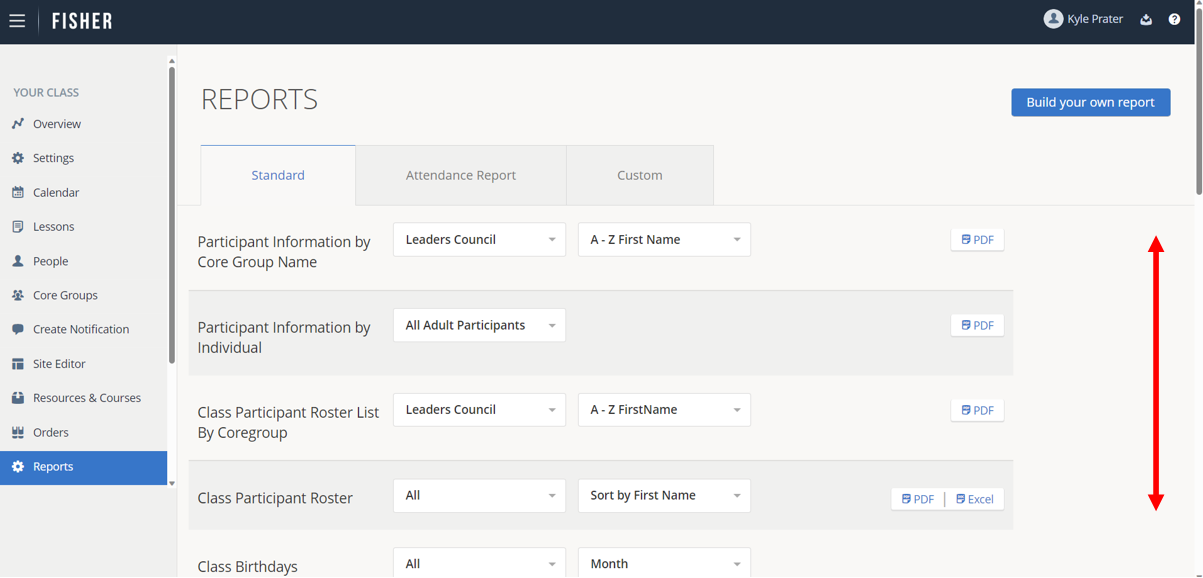
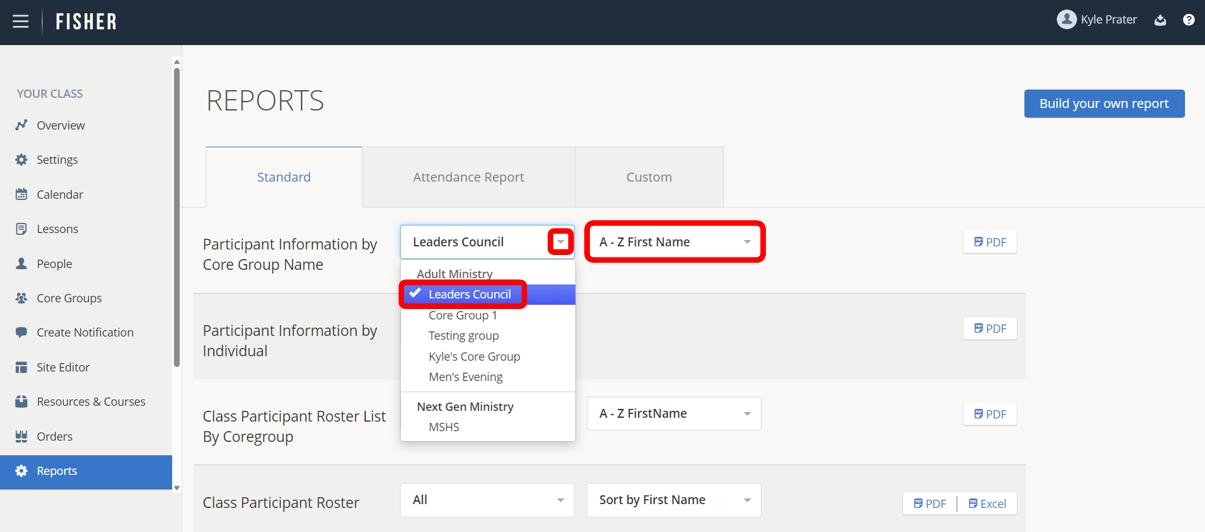
3.) Select the data you would like to include in your report from the dropdown menu. These options vary depending on which report you are trying to generate. Some reports allow you to filter your data based on certain types of participants or class locations. Some reports also allow you to select how you would like to sort the data in your report as well (A-Z, First and Last Name, etc).
4.) Click the button on the far-right side of the report to download it. Most reports can be downloaded as a PDF, but some reports can be downloaded as an Excel spreadsheet or be emailed directly to a participant.
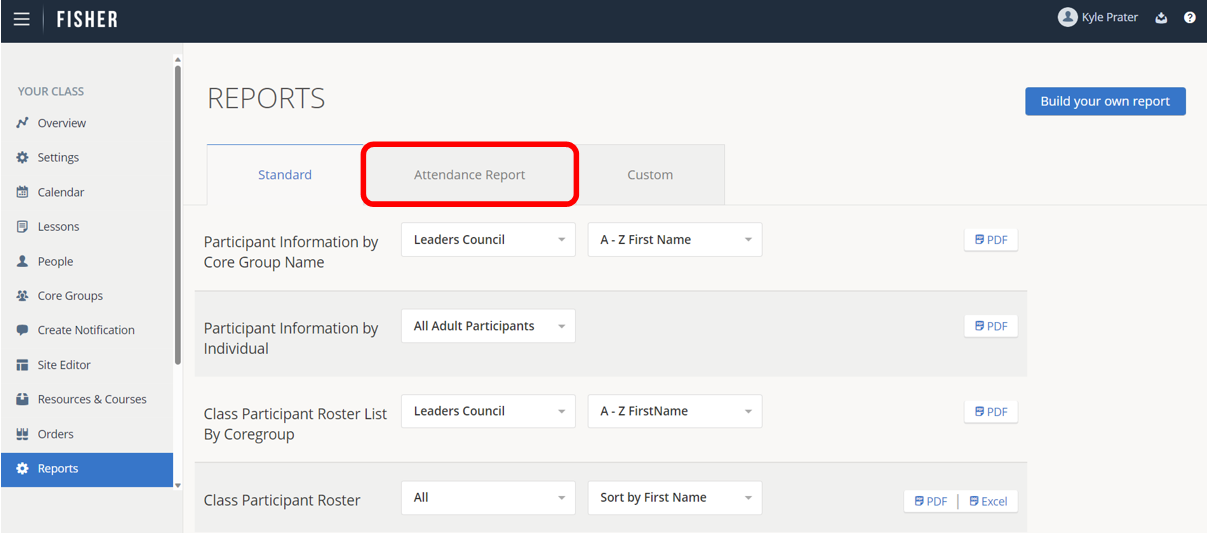
Attendance Reports
The Attendance Reports tab allows you to print attendance sheets for various class events.
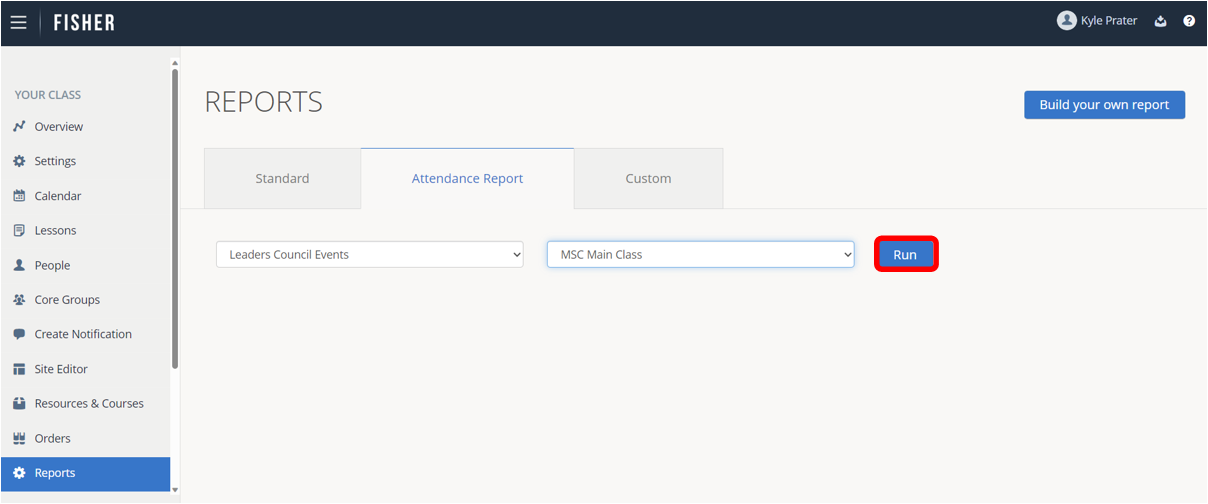
To generate and download an attendance report:
1.) Click Reports in the left pane.
2.) Click the Attendance Report tab.
3.) Under the first dropdown area, select the event you want to generate the attendance report for.
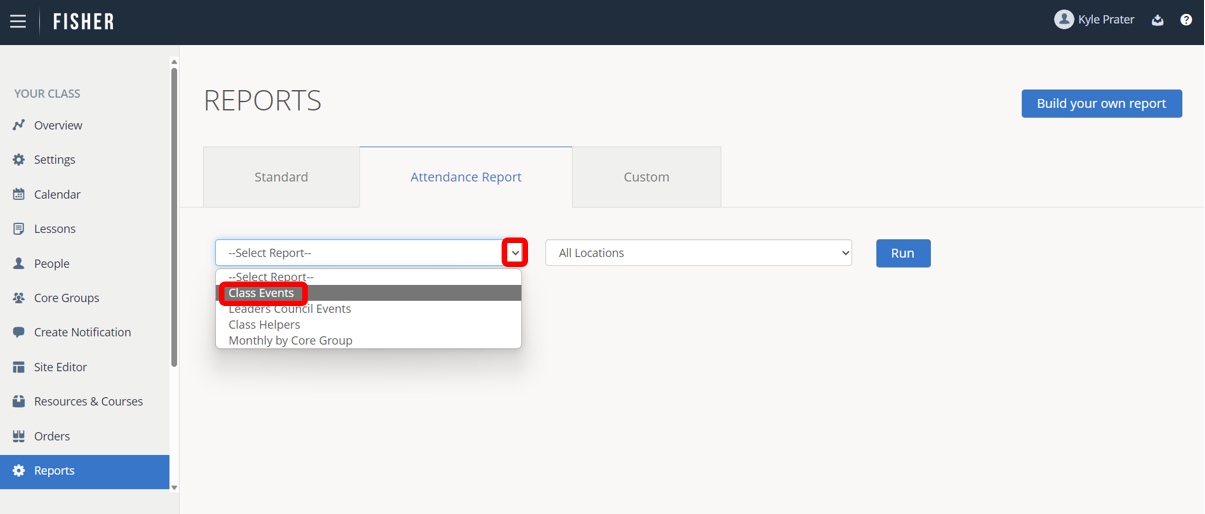
4.) Under the second dropdown area, select the location you would like to generate the report for.
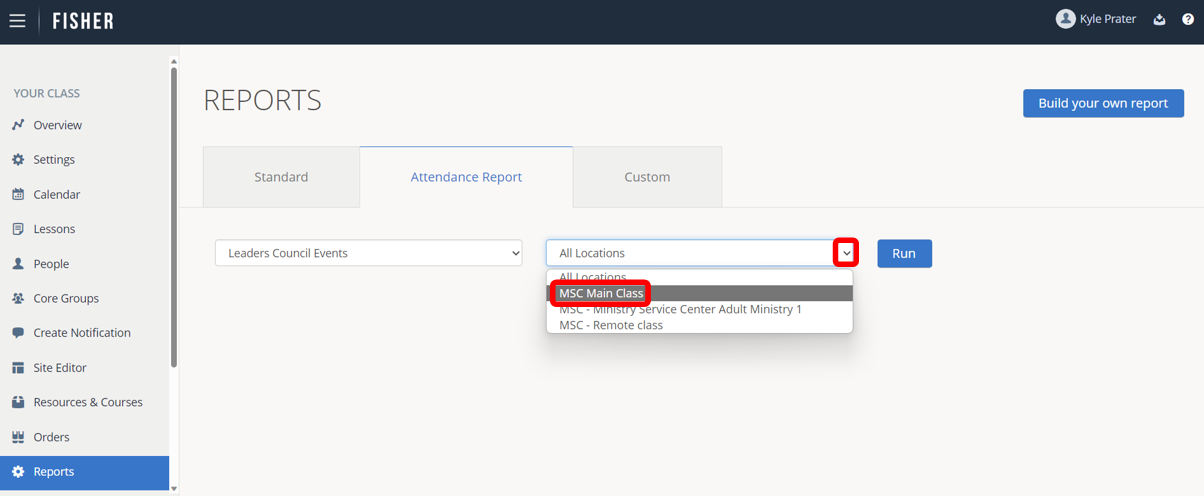
5.) Click Run.
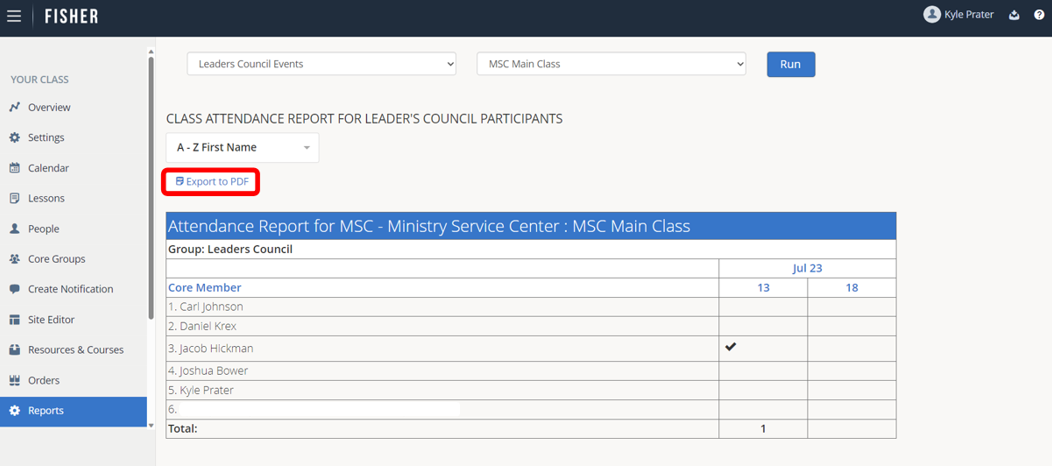
6.) A preview of your report will show. To download the report, click the Export to PDF button.
Custom Reports
The custom report area allows you to generate a custom report showing participants meeting certain criteria.
To generate a custom report:
1.) Click Reports in the left pane.
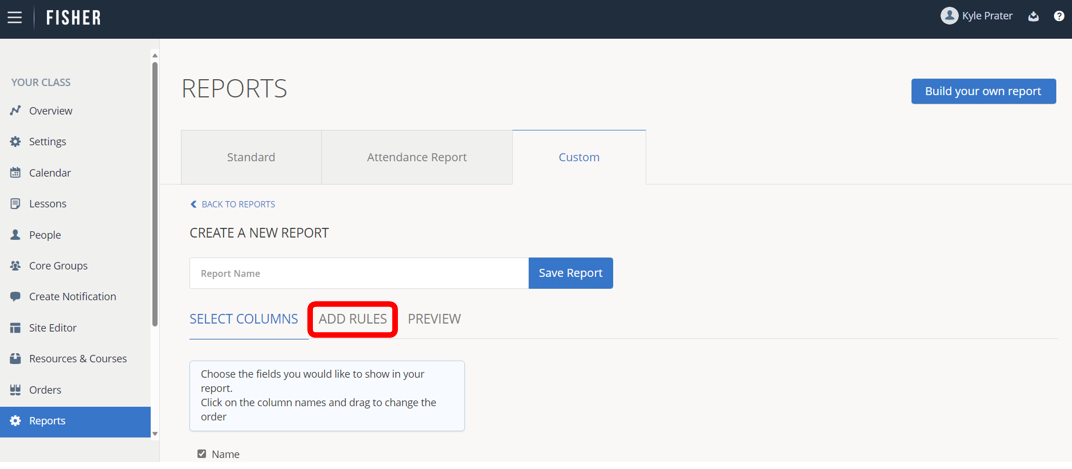
2.) Click Custom to see reports you have previously generated.
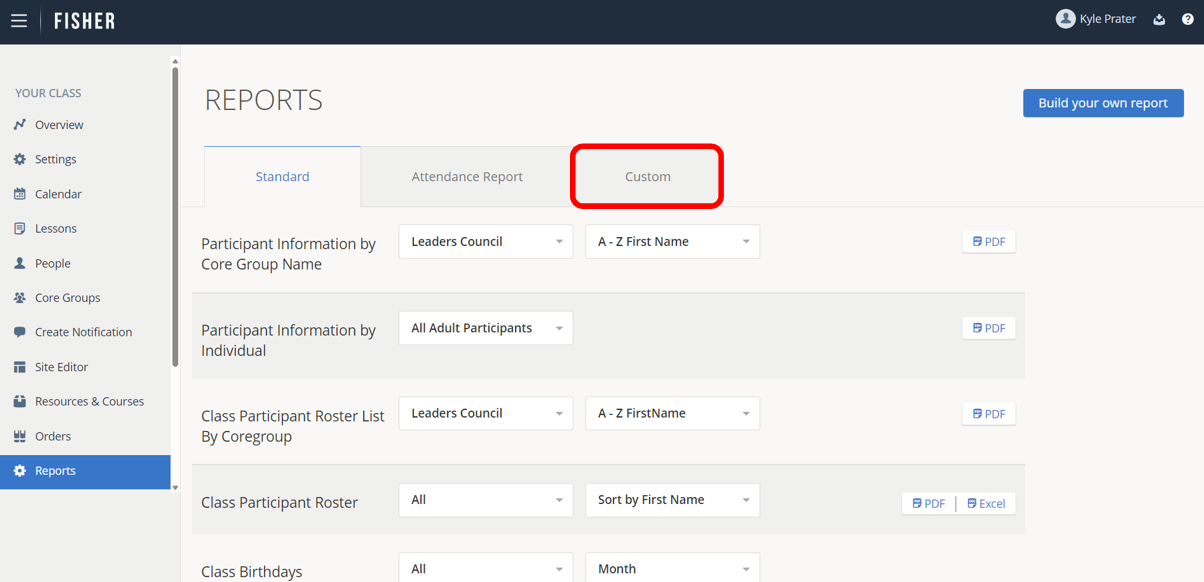
3.) To generate a new report, click the Build Your Own Report button in the top-right hand corner of the page.

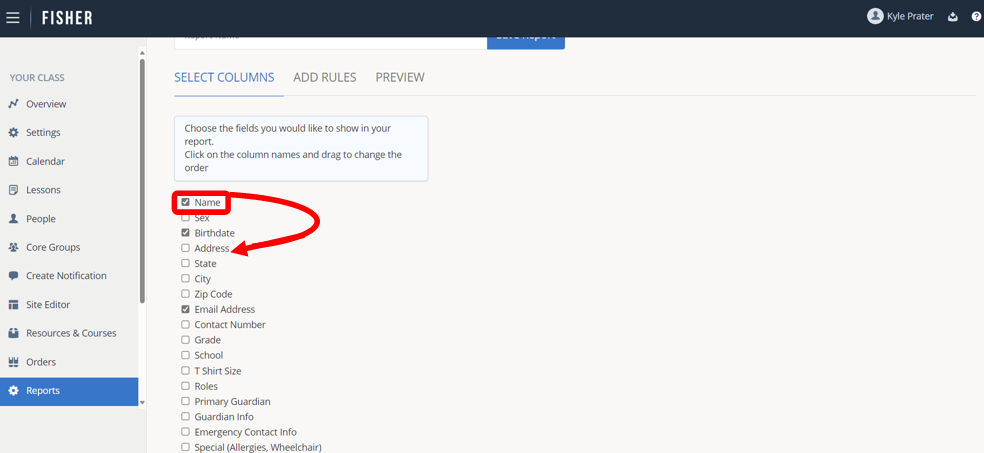
4.) Select the information fields that you would like to include on your report. Check the box next to the field name to include the field on the report.
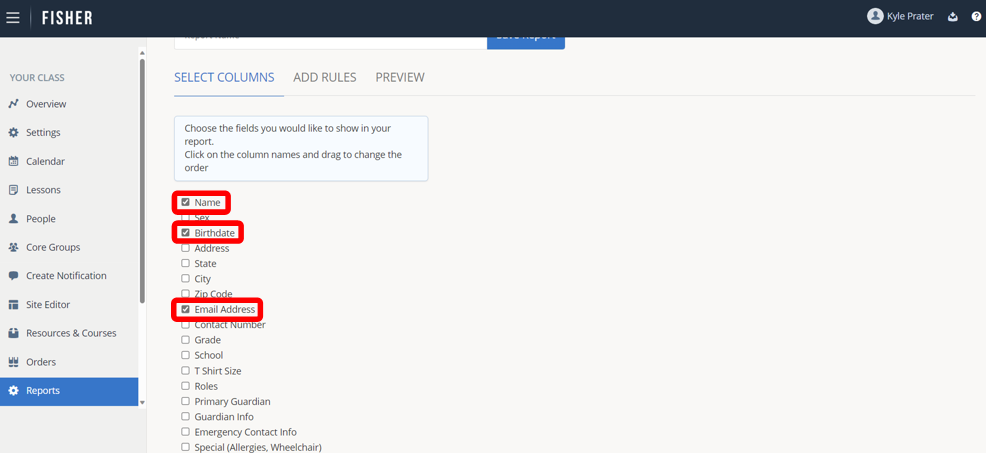
5.) The order the fields show on the page is the order the columns will appear on your report. Click and drag a field to a different spot to re-order the information.
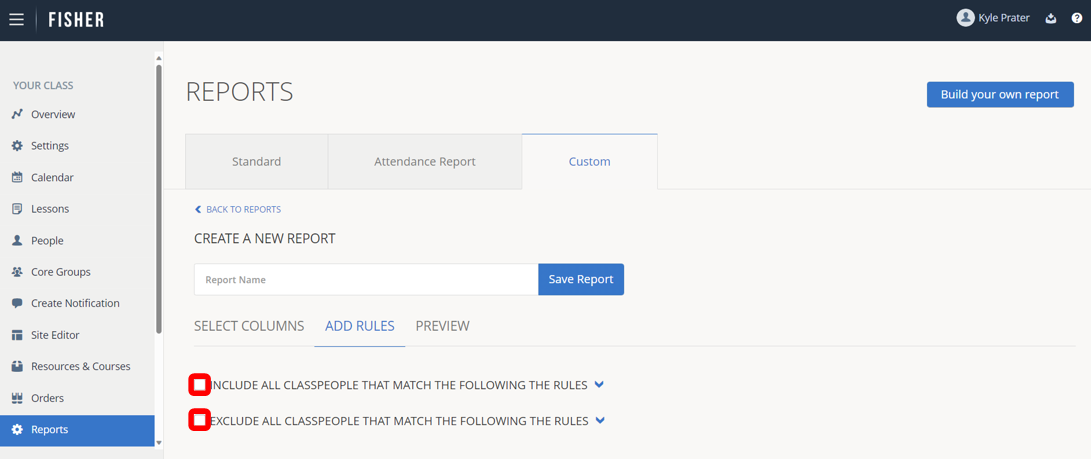
6.) If you would like to include or exclude participants based on certain criteria continue with step 6. Otherwise, jump to step 12.
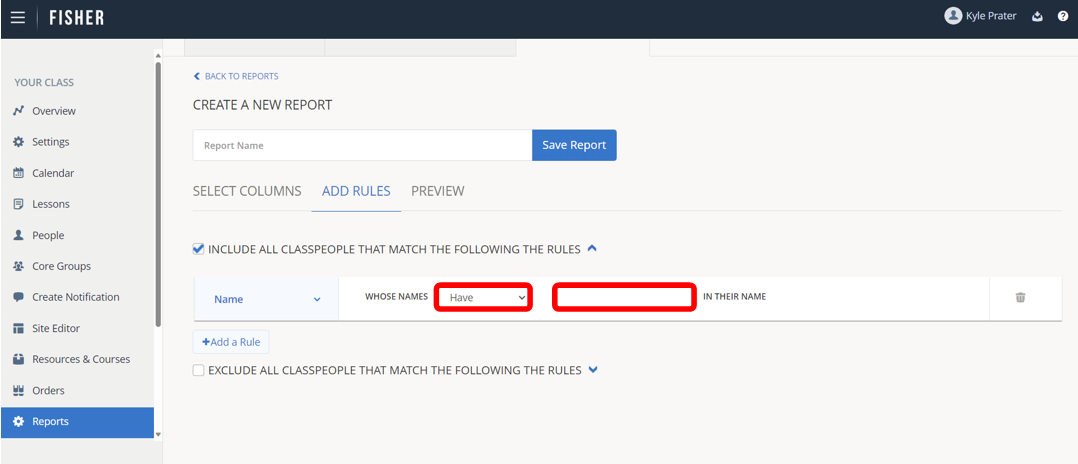
7.) Click on the ‘Add Rules’ tab to add filters based on different participant fields.
8.) Select the box next to the type of rule you would like to add. Include rules will filter the data to show only the participants who match the criteria you enter. Exclude rules will show all participants except for the participants who match the criteria you enter.
9.) Select a field that you would like to filter by from the dropdown on the left-side of the rule.
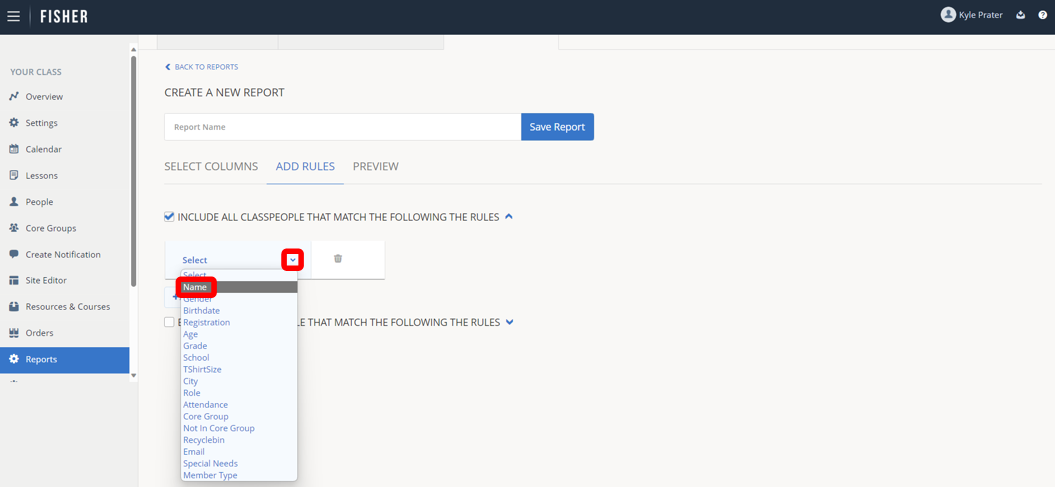
10.) Fill in the information that you would like to filter by.
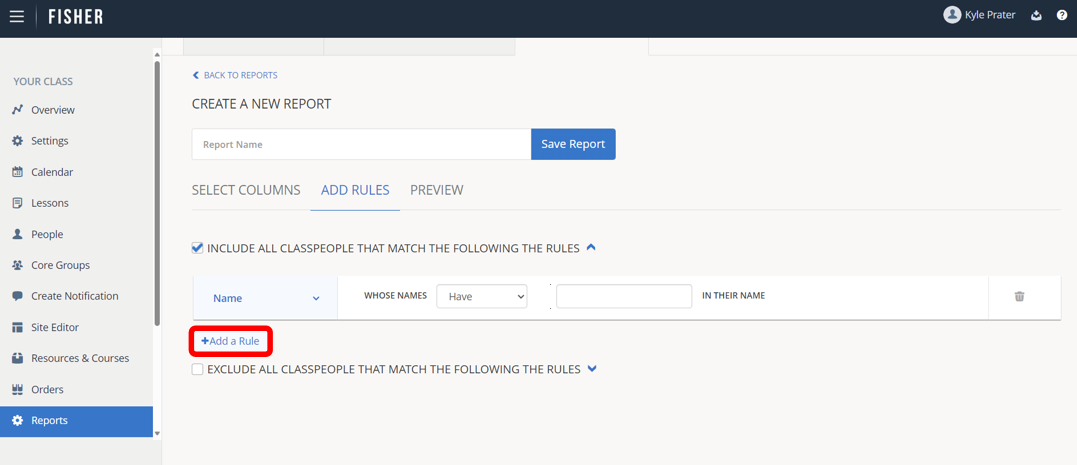
11.) If you would like to add additional filter criteria, click Add a rule.
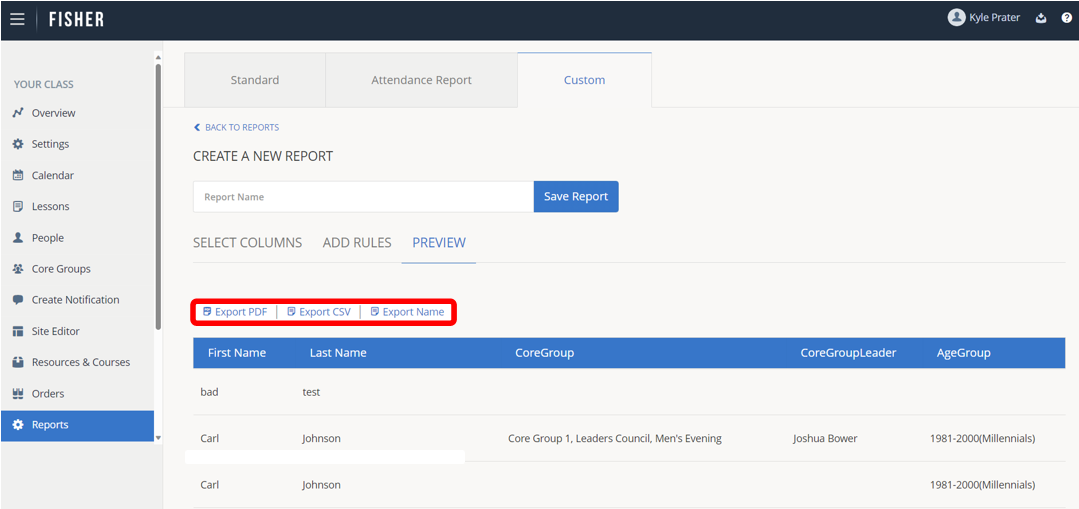
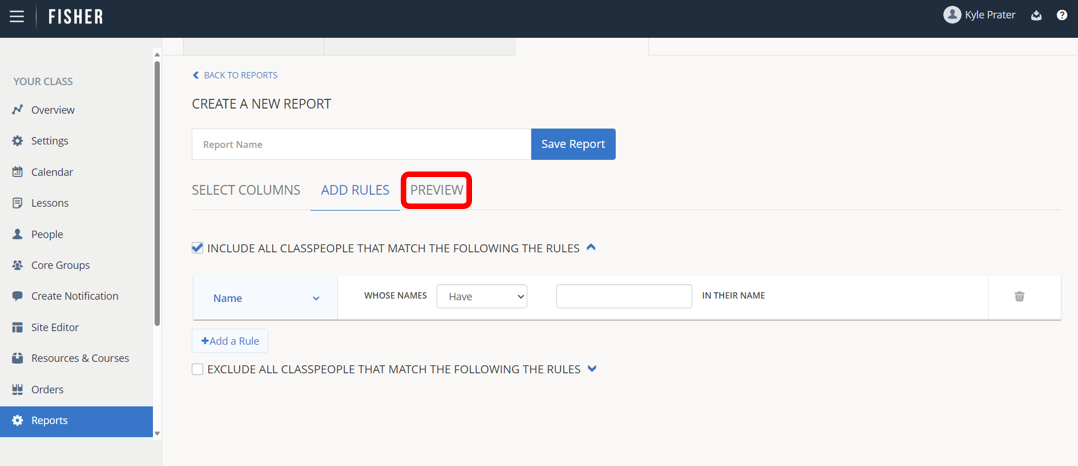
12.) Click ‘Preview’ to show the data that will appear on your report.
13.) To export your report, Click the Export button for the format that you want to use for your report.